Posted: 11/01/2024
Adding More Disk Space To Azure DevOps Agents
Out of the box, Azure DevOps Agents have very limited disk space in which to manage your source code.
All of these machines have at least 10 GB of free disk space available for your pipelines to run. This free space is consumed when your pipeline checks out source code, downloads packages, pulls docker images, or generates intermediate files.
For a very large Visual Studio solution (over 450 projects), this meant, we have run out of disk space!
Based on our analysis, we are building over 7GB of data during solution build alone, so with only 10GB to play with, running tests, building installers etc means we do not have enough space.
Unfortunately Azure DevOps does not provide a way of running a MS Hosted Agent with a custom disk size, so that left us with the only option to have a self-hosted setup.
This means setting up your own machine (build agent) to do the Solution Build etc on.
Microsoft give us the instructions to do this, and suggest using Virtual Machine (VM) Scale Sets to build multiple streams in parallel.
The process we need to follow is:
- Create a VM
- Install the build software on that VM
- Generate an Image of that VM
- Setup a VM Scale Set using that Image
- Tell DevOps to use the VM Scale Set
So this is how we did that:
Create VM
On your machine:
Find the right subscription to create the VM scale set etc on:
az account list -o table
az account set -s <your subscription ID>
Then start the VM image creation
az group create --location <azure reqion required e.g. westus> --name <group name>
List of available regions here: https://azure.microsoft.com/en-gb/explore/global-infrastructure/products-by-region/?products=virtual-machine-scale-sets
az vm create --name <VM Name> --resource-group <group name> --image <Image To Use> --admin-username <user name> --public-ip-sku Standard
Note "Image To Use" should be one of these: https://learn.microsoft.com/en-us/azure/virtual-machines/windows/cli-ps-findimage#default-images
Install the build software on that VM
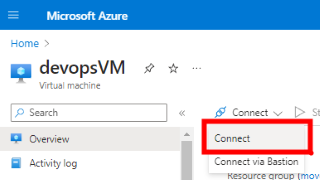
Now Connect (RDP) into the VM created.
(via the Azure Portal "Connect" option next to the VM)
Install the software you need to build your system, such as Visual Studio Build tools, Azure Powershell etc.
Note - The Azure Build agent software will automatically install later, but you still need the build tools you rely on. Some of this can be done via your Azure DevOps pipeline, but for things like Visual Studio then these need to be pre-installed.
e.g. All MS Hosted build agents have this software pre-installed, so you may need to install some of it yourself if you are not explicitly installing it in your pipelines: https://github.com/actions/runner-images
Reboot the VM to ensure all installations are completed.
Generate an Image of that VM
Connect back into the VM, and from an administrator Console Window / Command Prompt, run:
C:\Windows\System32\sysprep\sysprep.exe /generalize /oobe /shutdown
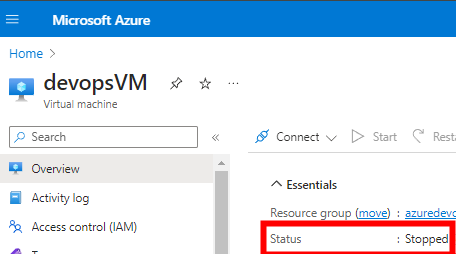
Wait for the VM to finish generalization and shutdown (in Azure you need it to say “STOPPED”). Do not proceed until the VM has stopped.
Then on your machine, run the following:
Deallocate the VM in Azure (stops you being charged for it)
az vm deallocate --resource-group <group name> --name <VM Name>
Tell Azure the VM has been generalised ready for imaging:
az vm generalize --resource-group <group name> --name <VM Name>
Create the VM Image from the generalised VM:
az image create --resource-group <group name> --name <VM Name Image> --source <VM Name>
Setup a VM Scale Set using that Image
And finally create the scale set using the image created:
az vmss create --name <group name>pool --resource-group <group name> --image <VM Name Image> --vm-sku Standard_D2_v4 --storage-sku StandardSSD_LRS --instance-count 2 --disable-overprovision --upgrade-policy-mode manual --single-placement-group false --platform-fault-domain-count 1 --load-balancer '""' --orchestration-mode Uniform --admin-username <user name> --public-ip-per-vm
Note: this VM has a public IP so you can RDP into it. You may also want to tweak some of the hardware characteristics dependant on your needs
Tell DevOps to use the VM Scale Set
Setup the Agent Pool as per these instructions: https://learn.microsoft.com/en-us/azure/devops/pipelines/agents/scale-set-agents?view=azure-devops#create-the-scale-set-agent-pool
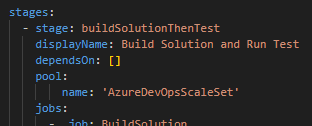
Then adjust your pipeline to use it. For a yaml file, you would add it in the
pool
section of your stage:
You are done
I found that to get Azure Devops to recognise and use the new scale set, you need to WAIT. It takes AGES to recognise and use the new set (in excess of an hour for me).
You will also need to start a pipeline run that uses the scale set to make it do things too.
Making changes to the VM Image
Run the steps in "Cleanup" to remove the existing scale set and the generalised VM.
Then create a new VM using your custom image:
az vm create --name <VM Name> --resource-group <group name> --image <VM Name Image> --admin-username <user name> --public-ip-sku Standard
Install the additional software, and make any other VM changes you need.
Then follow the steps for "Generate an Image of that VM" and "Setup a VM Scale Set using that Image"
Cleanup
To Cleanup if you need to run it again, run these:
Delete the scale set
az vmss delete --name <group name>pool --resource-group <group name>
Delete the VM
az vm delete --name <VM Name> --resource-group <group name>
Thanks for reading this post.
If you want to reach out, catch me on Twitter!
I am always open to mentoring people, so get in touch.